Have a wedding coming up and need the perfect wedding hair? With more Colorado couples taking advantage of our amazing Autumn weather to tie the knot, we’re only half-way through Wedding Season. With that in mind, Grand’s April Guerra has put together a quick walkthrough for a simply Perfect Wedding Do.
Read the full transcript here:
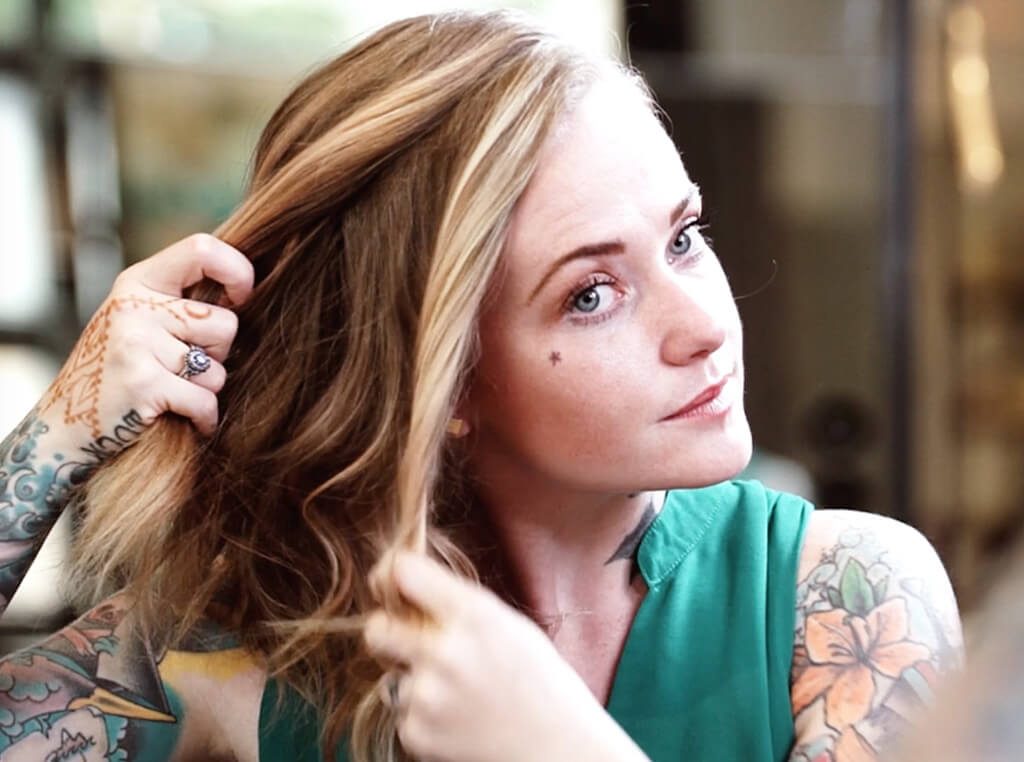
Hi, I’m April with Grand Salon, and I’m gonna show you how to do a simple wedding do.
My vision for my hair is to add some simple waves. I think I wanna have a heavy side part, and exaggerate it having one side pulled back. So, as far as sectioning goes, I want this heavy side part. I’m gonna go with my right recession here, and I’m gonna take that part back, and I’m gonna go back as far as my crown. Split the hair here.
As you can tell, my hair is dirty, at least a day. So for the oil at the roots, I’m gonna use some Prêt-à-Powder. And what’s nice about this is, it’s a tap-in powder. So I’m just gonna work it into my roots. Powder at the roots adds volume, and can get rid of that shiny look. It also will help when you’re switching your parts around, to help the hair stay the direction that you put it.
Now, sectioning for the curling I’ll be doing. I’m gonna go from recession to recession, and take this horseshoe-top part and clip it away from the rest. And then, I’m gonna follow this part back down and around, and separate the right side from the left side. Left side’s gonna have a lot more hair. Now, the sections I like to take to create the waves of my hair, I start from the ear forward. It’s usually about two inches wide, and no longer than the barrel of the iron.
I’m gonna start by putting the iron back behind the section, and I’m gonna wrap the hair away. Now, these sections are thicker than normal curling iron sectioning. And so, I leave it on the iron a little bit longer. Sometimes, when you pull it off the curling iron, it doesn’t create an exact curl, so I like to use my hand to force that curl in there.
Now, moving on to my sectioning. This section that I just created, I’m going by feeling. And it feels a little bit too skinny, so I’m gonna add a little bit more hair here. Using the curling iron in this wave pattern, the hair kind of naturally twists as you’re wrapping it, which is giving more of an s-curl. Which is more of a natural wave pattern, less of a curl pattern.
So if you use the clamp on your curling iron, you’re gonna end up with more curly hair and the ends will definitely be curly. When I wrap the hair around, you can see I get these Medusa-looking curls, and those I actually just let sit. I don’t brush ’em out, I don’t fiddle with them while they’re warm, I just let ’em sit in the hair.
Now, the lower section’s all done, I’m gonna shoot that with hairspray. And now, the top section. You don’t really want anything much wider than this barrel of the curling iron. For the bangs, I did go more up instead of more to the side, and that’ll create more volume. And the second spray’s into the top.
Now, I’m gonna work on this side. Now, I’m gonna go down and away from my face, and this section’s gonna get longer and skinner as we go. Hold this up, hairspray before. The iron…the iron’s the tricky part. I’m gonna be ambidextrous, and wrap it away from my face. I find it easier to always have the iron pointing down.
Now, the iron is going to hang a little bit low on my head to get all that length of hair, and it’s also leaning a little bit more horizontal. It’s not exactly horizontal, but it’s not straight up and down either. And this is just gonna help the hair stay up and away. By curling it that way, we’ll have to use less pins and it could be just less work for us.
Finish up hairspray. And now this side, on this side we’re curled two different directions. I’m gonna work on this side while it’s still a little bit warm, so these curls are gonna soften. And now, the goal is to get it back and away. I’m just gonna play with this first curl, and I’m gonna hold it up just how the curling iron was holding it. And I’m gonna pin it up to my head.
Now, I can see the next curl pattern happening. I’m just gonna follow the curl’s lead and do the same thing, keeping my sections pretty clean. And I’m not pre-opening the bobby pins, I’m just holding them here flat against my head, and using that little opening that’s already on the bobby pin to scoop in more hair. And on my last section, I wanna make sure to get all these little hairs down here in the nape.
Then I’m gonna pull that up and over. The curls will do it for you, really. Make sure the flat part of the bobby pin is against my scalp, so the raised bit can scoop up more hair. And now, this little tiny tail down there, I’m just gonna brush more around this way.
Now, this side’s all the way cooled down, and I’m gonna rake my fingers through it. I like when the colors of my hair get blended together in the curl instead of being separate curls. So I like to blend them together, and then kinda go through and create lay-on sections.
And then, the final detail is gonna be a little bit of Creme Contour, which is a specialty product that’s gonna help maintain volume, but give subtle separation. And I feel like it makes the look, look very finished. It gives that little tiny bit of shine to those dry ends, and kind of clumps together those little bits that are hanging out and about. And then, I just work that in, kinda pull some straighter. And now, I’m wedding ready.